Friday, March 30, 2012

Our LEGO Room, Part 4

Time to wrap up the tour!  If you've visited us before, you know that we usually announce our building challenges on Friday, however we're going to postpone that until next Friday so we can wrap up our LEGO tour.

The final "wall" of our LEGO room runs along the stairwell, then there's a space which serves as the "main entrance", and then there's a half-wall separating our LEGO room from our TV room.  


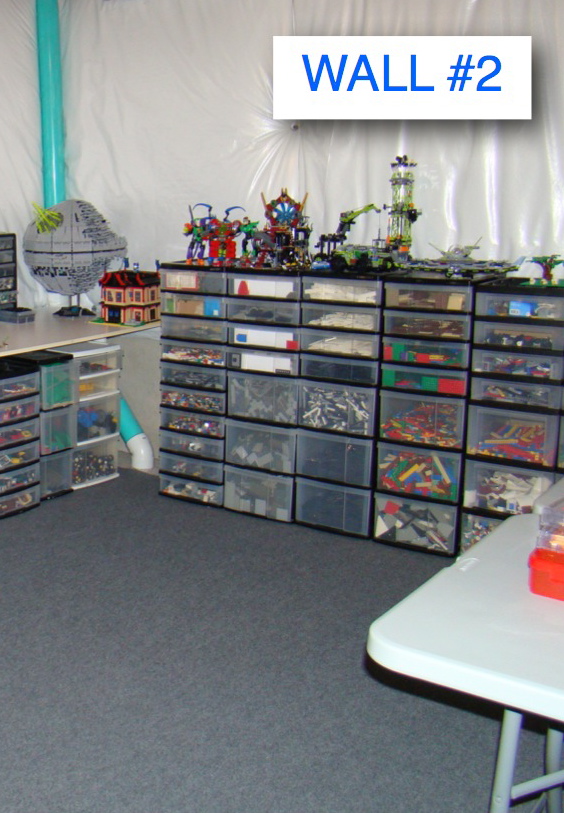
It starts off with another bookcase of storage that has lots of neat buildings and a LEGO pirate ship I designed.


This is what the half wall looks like.  We put a lot of our short drawer units here and put a long wooden board across them to create a nice even surface.


On top of the wooden board we stacked some wire shelves and put a board on that to have an elevated shelf.  These are all just scraps of things we had laying around.  Next to it is a table that I used to use for scrapbooking.


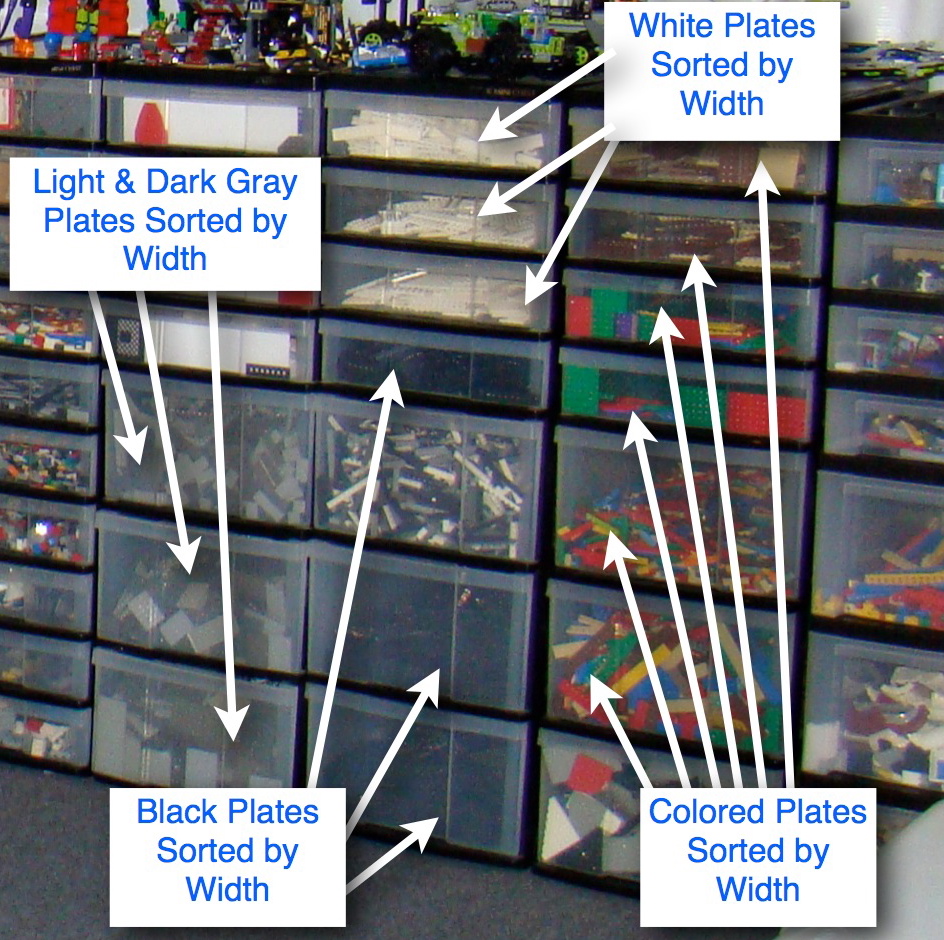
These drawer units hold blocks.  There are a few big deep drawers that we use to hold those really large baseplates that are hard to store.


And that's the complete tour!  It's a really great space to work in, particularly when it's clean.  The only down side is that LEGO collections only get bigger, and so we keep having to find creative ways to use the space we have.  Maybe we've given you some ideas you can use.

In the future I was thinking I might post about the LEGO collection itself - our sets date back to the 1970s, although those are few in number (just what survived from my childhood).  The bulk of our collection is from the mid-1990s and later.  Still, I thought it might be neat to revisit some of the oldies but goodies that we have.  So stay tuned!


If you missed the beginning of the tour, this link will take you back to the first post.

Wednesday, March 28, 2012

Our LEGO Room, Part 3

This is the 3rd part in a four-part tour of our LEGO room.  If you missed the previous parts, you can find them here and here.

"Wall" #3 isn't really a wall.  It's a row of mismatched bookcases.  When we run out of room in the LEGO room, we move this wall back a few feet.


We've acquired these bookcases at different times from various places, mostly as hand-me-downs.  LEGOBoy loves Star Wars sets and hates to see any of them taken apart, so we needed a LOT of shelf space to keep them.  Someday when we finish the basement, we'll probably add shelving to the walls, but for now this is our solution.


After the last bookcase there's about 4 feet of space that allows access to the back part of the basement.


We also use the bookcases to hold our minifigures.  I have previously posted about how we store those.  If you missed it, you can read up on the wonders of the Scraponizers here.  They're sorted by theme and labeled so it's pretty easy to find what you're looking for.


Up on top of the bookcases there's just enough room to store LEGODad's Super Hero Statues, as well as some Hero Factory containers that I'm not sure why we're saving, but we are.


I do have to say that dusting off these shelves is a major pain, and doesn't get done as often as it should.  If anyone has any tips for keeping LEGOs dust-free, let me know!

That wraps up this installment.  One more wall to go!

Monday, March 26, 2012

Our LEGO Room, Part 2

As promised, our tour of our LEGO room continues today.  If you missed the first post, you can find it here.

Along the second wall of our LEGO room, we have a long stretch of storage units with pieces, pieces, and more pieces.


We use the tops of the storage units to hold constructed sets, bins of pieces to sort, boxes we want to keep...and once it gets too crowded, we start to disassemble things until everything has a home.

We've got three storage units that hold all different colors & styles of plates.  We have some in other places, too, but as much as possible, we try to keep parts that are similar near each other.


Below is the bookcase where we keep our instructions & catalogs.  We have all our instructions in plastic sleeves and sorted by number.  There's no more room for binders, so I guess that means we're done buying LEGOs...not.  We do have to find a place where we can put more binders, though.


The yellow grandfather clock is something we (LEGOMom & LEGODad) built a LONG time ago - in the B.K. (Before Kids) era.  We keep it together because if we didn't, we'd need a MUCH larger drawer for yellow blocks. :)  At the time, brown blocks weren't very common, and that's why we went with the yellow/red color scheme.  We left a hole in the clock face and bought a clock mechanism to fit through it, so the clock does actually work.  This piece has survived 2 moves, which is pretty impressive, considering it isn't glued together.  The dragon on top isn't part of the design.  He got crowded out of his old spot, so I perched him there, rather than disassemble him.


So that's the highlights of Wall #2.  Check back in 2 days for the next installment!

Saturday, March 24, 2012

Our LEGO Room, Part 1

This is the first post taking you behind the scenes & into our LEGO room.  When your LEGO "hobby" moves into the LEGO "fanatic" and the LEGO "obsessive" phases, you have to have decent organizational skills to keep from winding up as the main feature on an episode of Hoarders :).

Fact:  We have a lot of LEGOs.  This is the result of roughly 20 years of collecting.  With a 7-year-old boy to use as an excuse, our collection has hit a rapid growth phase.  I thought you might like to see how we manage it.  I enjoy reading other posts about how other people store their LEGOs, and hope you'll enjoy finding out about our system.


Our LEGO room is located in the basement of our house.  I have a lot of pictures to share, so I've broken things up into separate posts.  Part 1 is going to feature one wall of our LEGO room.  By the time we get to Part 4, you will have taken the complete tour.

First are a few overview shots.  Most of our collection is stored in plastic drawer storage units of all different shapes and sizes.  They are manufactured by Iris.


We put two 6-foot folding tables next to each other to create one large, squarish building surface in the middle of the room.


And now some close-ups showing the nitty-gritty.  Actually, nothing is gritty.  We're very particular about taking good care of our LEGOs.  The first shot shows some of our nice large drawer units.  They're wide and pretty deep and good for holding big things.


On top, we've perched a couple of small drawer units to hold tiny things.


At the end of the line we put in this desk which gives a little more display space and allows for some short drawer units to be stored underneath.  I love the Death Star sets, but man, are they difficult to display.  They take up a ton of space, and you don't want to put them where an excited kid might knock them down!


So I hope you've enjoyed Part 1 of this four-part series.  I will aim to keep posting every 2 days until your tour is complete, so be sure to bookmark us and check back.  We also would love to hear from you - feel free to click on the About Us link to grab our email address and say hi!

Updated to Add:  Part 2 is now posted.  Click here to read the next installment.

Friday, March 23, 2012

Building Challenge #11

Time for a little confession...I forgot to get my model ready for this week's challenge!  We've had record warmth here - we set a new all-time high temp for March - 82º!  That's unheard of for Western New York.  It's been in the 70s for almost a week and as a result we've been spending a lot of our free time doing outdoorsy things.  So in honor of that, this week's challenge is to start something and NOT finish it!  We should have a lot of entries for this one :).  Actually, I'm kidding.  That's not really the challenge.


Building Challenge #11 - We Built This City
This week the challenge was to build something you'd find in a city.  LEGOBoy did complete a model for this week - a town hall.  He added in a bunch of fun details which you can see in the close-ups.

Town Hall, by LEGOBoy

Secretaries (with a BIG stack of paperwork), and Metal Detector in Foreground

Break Room/Utility Room - with Coffeemaker & Fire Extinguisher


The Judge and a very diabolical criminal
And now here's my model...the unfinished symphony.  I started this modular building quite awhile ago and thought I'd use this challenge as an opportunity to finish it.  Sadly, I didn't get any further with it.  So here it is in it's partially complete state:

Modular House, by LEGOMom

Reverse View

Front View
I was trying to make this house in the same scale as the other modular buildings LEGO has released.  I still hope to finish this - add some landscaping, a second floor, and some sort of roof. (And decorate the inside, too, of course!)  I'll add updated photos as construction progresses...  Hopefully you are having better luck finishing what you started this week!


Friday, March 16, 2012

Building Challenge #10

Happy Friday once again!  The weather has been just great this week, so we've been getting outside a little more.  But we've still found time for our favorite hobby!  Actually...this week, we're sharing two of our favorite hobbies...LEGO and reading!


Building Challenge #10:  Inspired by a Book

This week we let what we've been reading inspire our creations.  LEGOBoy and I read The Curse of King Tut's Mummy and I was inspired to revisit our Egyptian LEGOs.  I had a ton of fun with this model.

Pharaoh's Tomb Sarcophagus
The Book
Pharaoh's Tomb, by LEGOMom
Inside the Sarcophagus
Inside the Coffin
Reverse Angle
Rubble & Treasure
Throne, More Treasure
Sarcophagus
Entrance
Sorry for the crazy amount of pictures.  I just had a lot of fun with this one and got a little camera-happy as a result.

LEGOBoy took his inspiration from one of his favorite books, Return to the Hundred Acre Wood.  It's not written by A.A. Milne, but is very close in style and just as entertaining.  He chose to re-create the cricket match between the four-legs and the two-legs.

The Book
Cricket Match, by LEGOBoy
Winnie the Pooh with Cricket Bat, Wicket
Tigger with Ball (Stormtrooper helmet)
I hope you enjoyed your visit this week.  As always, you are invited to share your creations with us!  Link up below, and have a great weekend!


Friday, March 9, 2012

Building Challenge #9

I can't believe we're already on our 9th challenge!  So what are we up to this week?


Building Challenge #9 - Play with Your Food!

I'm pretty sure I was hungry when I chose this week's challenge.  This week we challenged ourselves to make food out of LEGOs!  And oddly enough, we seemed to choose things from the dessert category.  So take a look at the tasty treats we're serving up this week:

Ice Cream Sandwich, by LEGOBoy

LEGOBoy went with the simple, yet elegant, yet delicious ice cream sandwich.  We've been snacking on these lately - very yummy!

I wanted to make a LEGO cupcake, because I thought the wrapper was a challenge I could handle.  Despite much tinkering, it didn't turn out quite as well as I had hoped.  

Cupcake, Front View, by LEGOMom
I like it, but I'm still convinced I could do better.  The frosting and sprinkles went roughly according to plan.  I really feel like I want a redo on this one, but with the pieces I have available, I'm not sure there's much I could adjust.
Cupcake, Side View, by LEGOMom
So hopefully we've inspired you to either find something delicious to eat, or even better (and better for you!) - join us in this challenge!

Thursday, March 8, 2012

LEGO: Cure for the common headache

The weather has been bouncing around like a yo-yo here - the temp goes up and down, up and down, and it's really been messing with me.  I had a brutal sinus headache yesterday and spent part of the evening on the couch.  My sweet son decided to cheer me up by surprising me with a LEGO creation.  This is what he made:

Get Well, by LEGOBoy

I love when he gets a great idea and disappears into the LEGO room, then returns with something truly unique and wonderful.  He was especially proud of the way he thought of making the W.  And his message did the trick - it brought a smile to my face.  I'm a pretty lucky mom.  :)

Friday, March 2, 2012

Building Challenge #8

Here we are at yet another Friday!   This week just flew by.  Anyway, if it's Friday that means it's time for this week's building challenge!


Building Challenge #8 - Building Buddies
This week's challenge isn't about what you build, it's about who you build with!  This week we are challenging you to put two (or more) great minds together and create anything you'd like!  Sometimes it can be a challenge to build as part of a team, but sometimes one person's creativity can spark another's.

So for our inspiration model this week, my son and I created something in honor of the new LEGO Ninjago TV show that has been airing.  We've been keeping up with the episodes on YouTube since we cut off the satellite company.  My son really wanted to build the home of the Venomari, as pictured in the screen shot below from Episode 5 (Ignore the Episode 8 label.  Everyone who posts videos on YouTube seems to use their own weird numbering!)


Here's our creation, which we've started to refer to as the Venomari Temple:

Venomari Temple, by LEGOMom & LEGOBoy

So who built what?  I built the twisted trees and found that nice big brown arch in the back that kind of creates the "temple" area.  LEGOBoy added the venom dripping from the trees.


You may recognize this new LEGO set that we incorporated into our model - set #9440 The Venomari Shrine.  We tucked it in underneath our arch.  LEGOBoy continued the green transparent pieces from the model onto the baseplate, creating a bit of a waterfall effect.


It took both of us to fill in all the venom.  All we had were a lot of tiny pieces to use.  *A LOT*.


And here is Lasha, who was our construction overseer, and occasionally contributed suggestions of his own.   :)

And now...it's your turn!  Get busy building with a buddy!  And as always, we'd love it if you came back and shared your creations with us, too.  Enjoy your weekend - hope it is LEGO-filled!
Related Posts Plugin for WordPress, Blogger...